This chapter shows you how to create your own image processing functions.
The source code for the version of this sample program can be found under samples\C# *\Image Processing in your My Documents/IC Imaging Control 3.5 directory.
Create a new project and add IC Imaging Control to the form. Before you run the program, select the video device, input and video format as shown in the First Steps Visual Studio .NET 2010 chapter. Alternatively, run the program without selecting a device. In this case, the program shows the device selection dialog provided by IC Imaging Control. If you close this dialog without having made a selection, the program will display an error message and terminate.
Add 3 buttons to the form and label them Start Live, Stop Live and Process. Name them cmdStartLive, cmdStopLive and cmdProcess respectively. Now add the following code to the Click events of the buttons:
[C#]
private void cmdStartLive_Click_1( object sender, EventArgs e ) { // This sample works works for color images, so set the sink type to RGB24 icImagingControl1.Sink = new TIS.Imaging.FrameSnapSink(MediaSubtypes.RGB24); icImagingControl1.LiveStart(); cmdStartLive.Enabled = false; cmdStopLive.Enabled = true; cmdProcess.Enabled = true; } �������
Note that we add a FrameSnapSink to icImagingControl1 with a MediaSubtypes.RGB24 frame type. This sink is needed to allow the Process method to fetch a new frame.
[C#]
private void cmdStopLive_Click( object sender, EventArgs e ) { icImagingControl1.LiveStop(); cmdStartLive.Enabled = true; cmdStopLive.Enabled = false; cmdProcess.Enabled = false; } �����
[C#]
private void cmdProcess_Click( object sender, EventArgs e ) { Cursor = Cursors.WaitCursor; try { FrameSnapSink sink = icImagingControl1.Sink as FrameSnapSink; IFrame imgBuffer = sink.SnapSingle( TimeSpan.FromSeconds( 5 ) ); var frameType = imgBuffer.FrameType; unsafe { byte* pDatabyte = imgBuffer.Ptr; for( int y = 0; y < frameType.Height; y++ ) { for( int x = 0; x < frameType.BytesPerLine; x++ ) { *pDatabyte = (byte)(255 - *pDatabyte); pDatabyte++; } } } if( _displayForm == null || _displayForm.IsDisposed ) { _displayForm = new Form(); } _displayForm.BackgroundImage = imgBuffer.CreateBitmapCopy(); _displayForm.Size = frameType.Size; _displayForm.Show(); } catch( Exception ex ) { MessageBox.Show( ex.Message ); } Cursor = Cursors.Default; } ��������������������������������
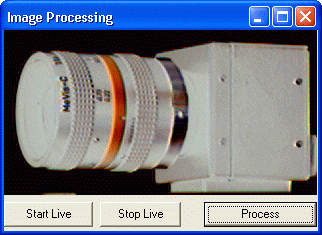
Note that fetch a frame from the sink we added in the cmdStartLive click handler. The we 'invert' every byte of the frame we just took and display this in the _displayForm.
If a video format is selected, which has more than 8 bits per pixel, it must be considered that the image buffer still contains the same number of pixel per line, but that each pixel contains more than 1 byte now, meaning the size of the buffer has increased. For instance, if the video format is RGB24(640x480), 640 by 480 pixels with 3 bytes per pixel, then the image buffer will be 1920 by 480 bytes in size.
For RGB24, the pixel data has to be interpreted as follows: The first byte of a row is the blue value of the first pixel, the second byte is the green value of the first pixel and the third byte is the red value of the first pixel. The fourth byte is the blue value of pixel 2, and so on.
And this is what the result will look like:

